
Table Rotisserie Kit is composed of the following parts:
1. Support plate 2. Right-angle connector 3. Flat-shaped connector 4. Frame plate 5. Nylon Handle 6. Extension rod 7. Rotating rod 8. Fork 9. DC motor

INSTALLATION STEPS
Step1
Insert the 2pcs Right-angle connectors into the side grooves of any Frame plate according to the direction shown in the figure, and fix them with 4pcs M6*10mm screws.
Follow the same steps to install another one.

Step2
Insert the other end of any Right-angle connector installed in the previous step into the side groove of any Frame plate according to the direction shown in the figure, and fix it with 4pcs M6*10mm screws.

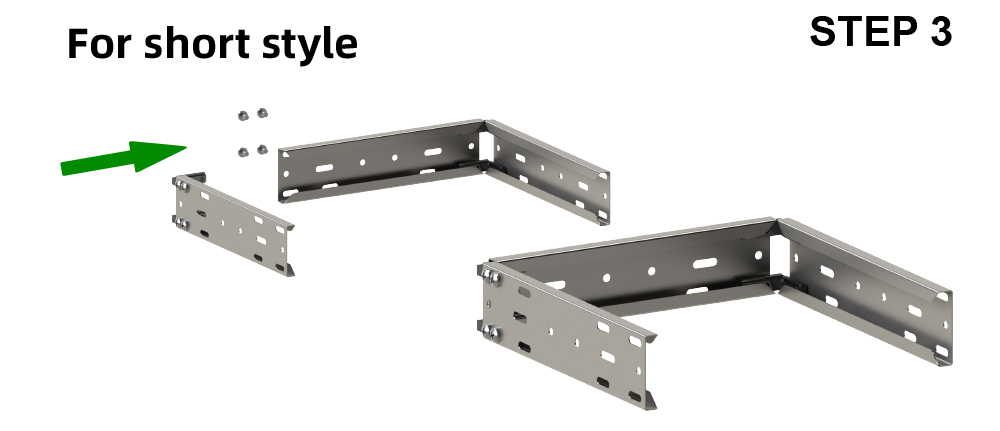
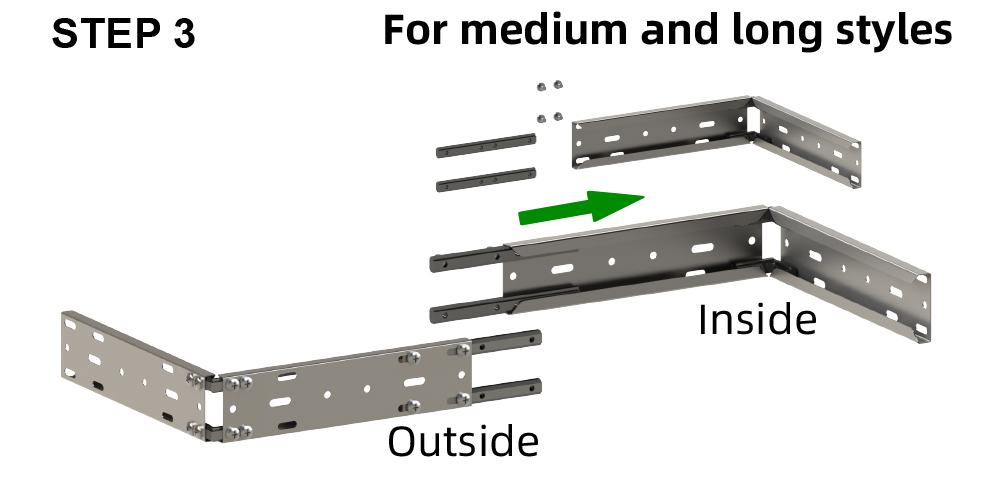
Step3
(For short style)
Insert the other end of the Right-angle connector installed in the first step into the groove on the other end of the Frame plate installed in the previous step in the direction shown in the figure, and fix it with 4pcs M6*10mm screws.
The short frame installation is complete.
(For medium and long styles)
Insert the two Flat-shaped connectors into the groove at the other end of the Frame plate installed in the previous step according to the direction shown in the figure, and fix them with 4pcs M6*10mm screws.
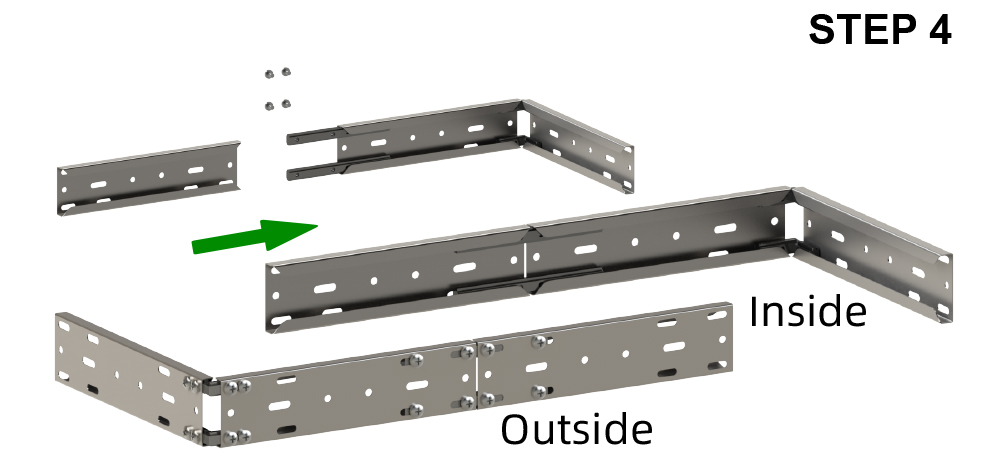
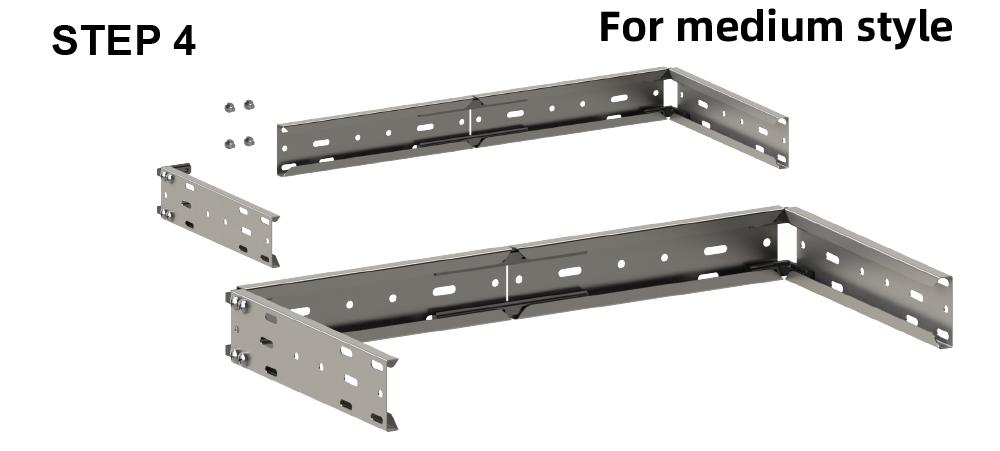
Step4
Insert the other end of the Flat-shaped connector installed in the previous step into the side groove of the Frame plate according to the direction shown in the figure, and fix it with 4pcs M6*10mm screws.
(For medium style)
Same for the step 3 of the For short style
The medium frame installation is complete.
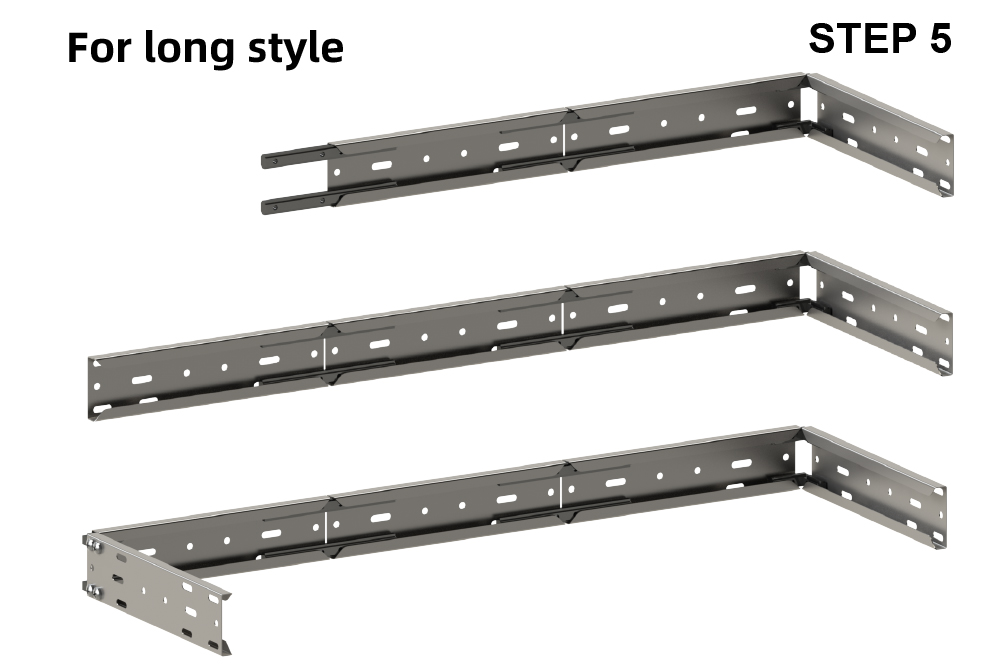
Step5
(For long style)
Same for the step 3 and step 4 of the For the medium and long styles, and same for the step 3 of the For short style
The long frame installation is complete.
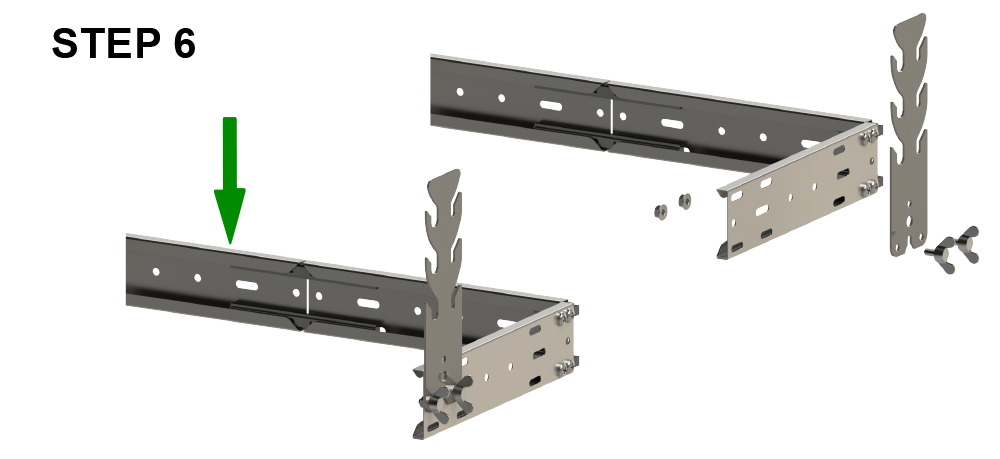
Step 6
(Rotisserie kit installation)
Fix the support plate on the installed Frame with M6 wing screws and M6 flange nuts as shown in the figure.
Note: The support plate can be installed regardless of the front and back.
Step 7
Same as before, the second support plate must be installed in the same direction as the first plate (otherwise it will cause installation errors).

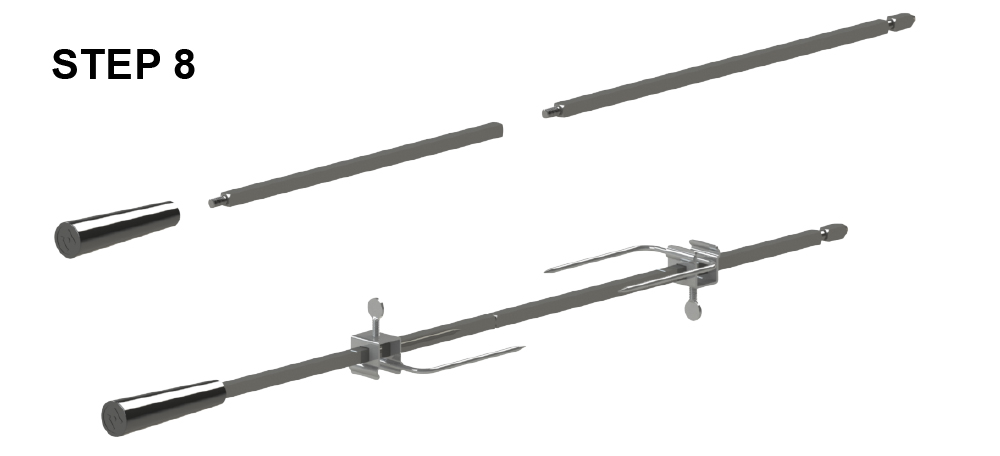
Step 8
Screw the rotating rod, (or 1pc Extension rod, or 2pcs Extension rods), and Nylon handle clockwise together as needed.
According to the actual situation of the food, The forks through the rod, screw the thumb screws to the forks. After loading the food, adjust it to the proper position and tighten the thumb screws.
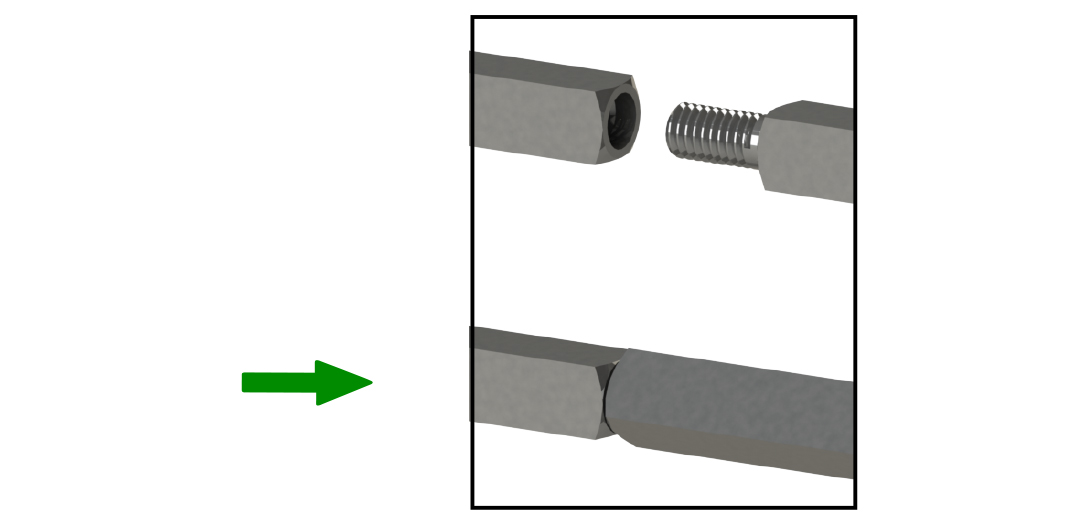
NORMAL MISALIGNMENT
NOTE:Thread processing needs to have a certain clearance, so it is difficult to have the same plane after the rod is tightened, and there will be a normal misalignment. At this time, you only need to loosen the rod a little, then put on the fork to the rod after the plane coincides. Tighten the rod after all the food is loaded.
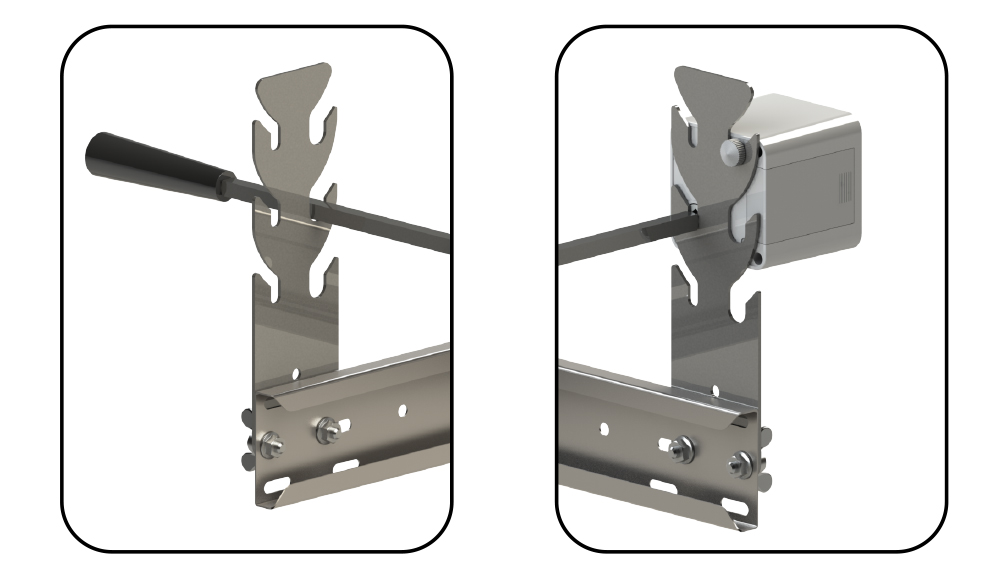
Step9
Refer to motor installation instructions(Click the picture below)。
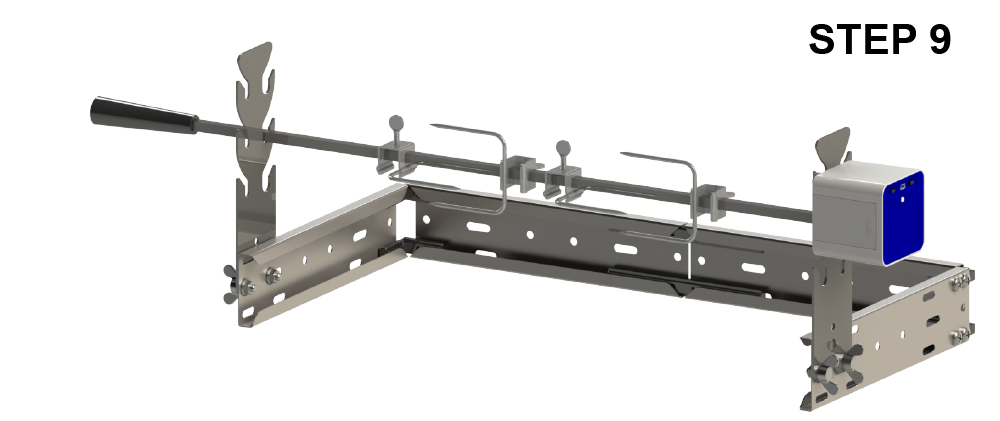
NOTE: The Rotating rod is placed in the small groove, the Extension rod is placed in the large groove.
The installation is complete.
Installation Video: