
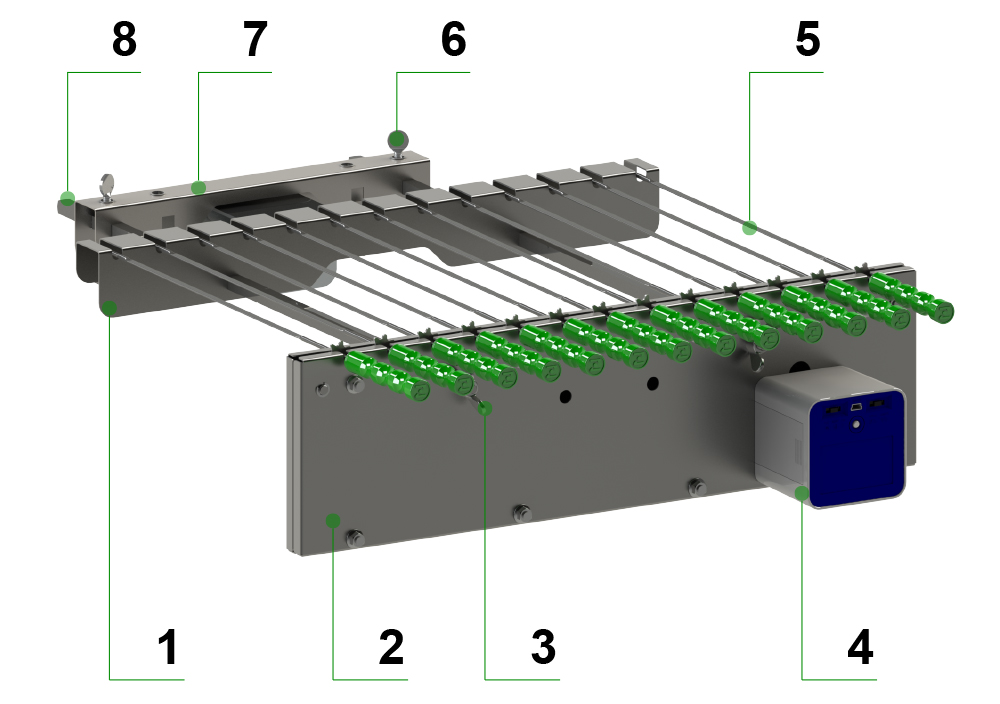
1 Skewer support frame 2 Main engine 3 Wing nuts 4 DC Motor 5 Skewers(Special needles or Mother clips) 6 Thumb screws 7 Fixed frame(with screws) 8 Guide rod
INSTALLATION STEPS
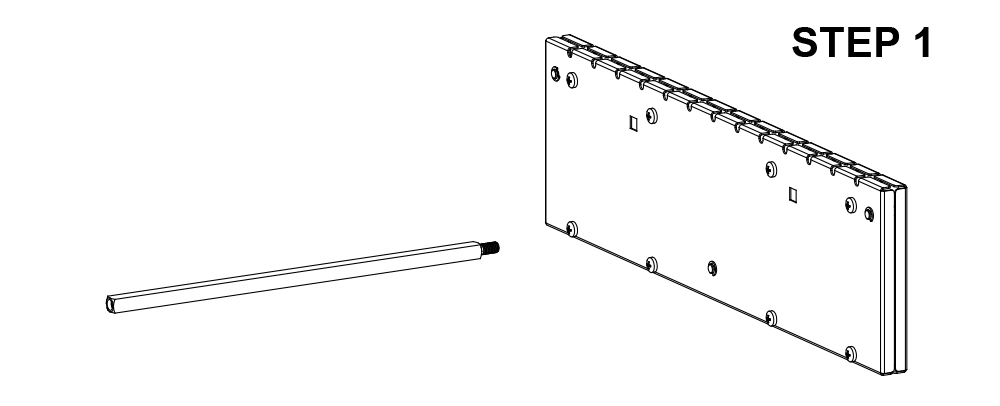
Step1
Insert one of the threaded ends of the guide rod into any square hole on the back of the main engine unit as shown in the figure, and pass the round hole on the front.
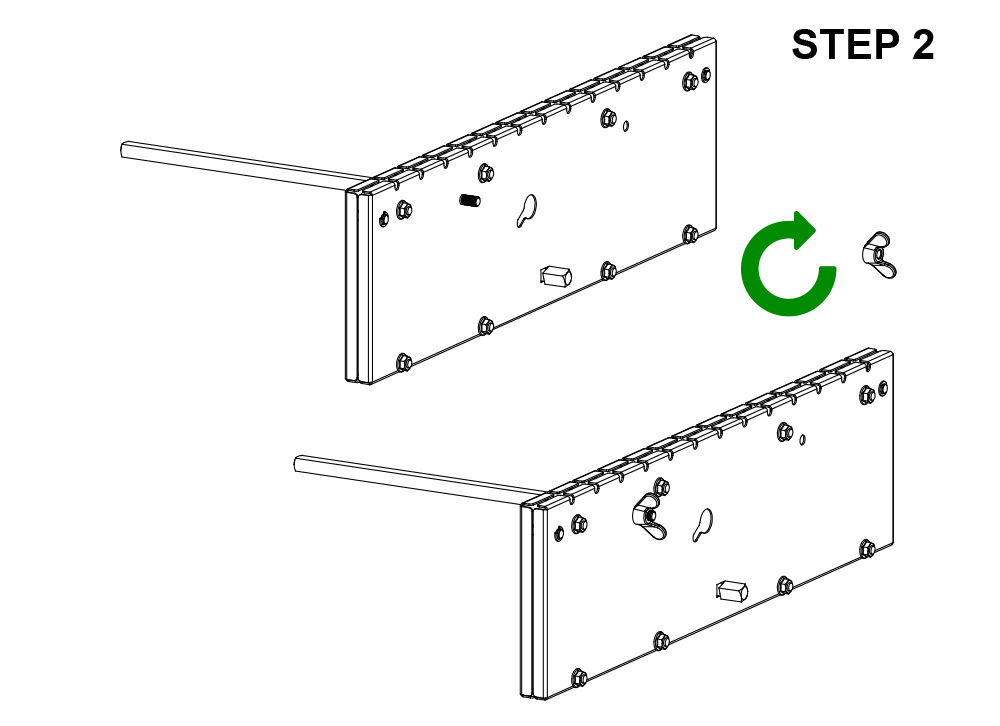
Step2
Screw the wing nut clockwise to the thread of the guide rod, do not tighten it.
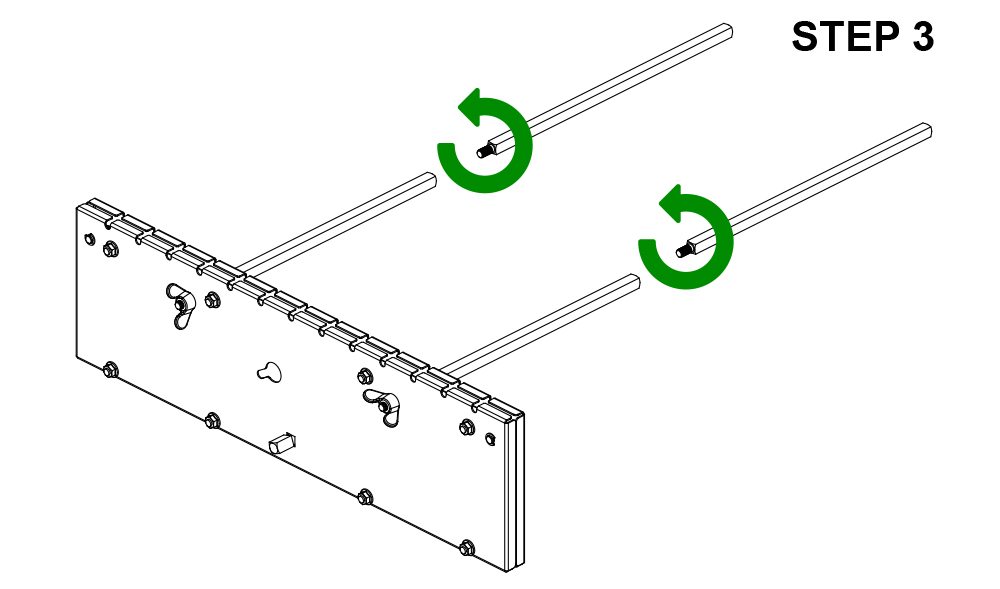
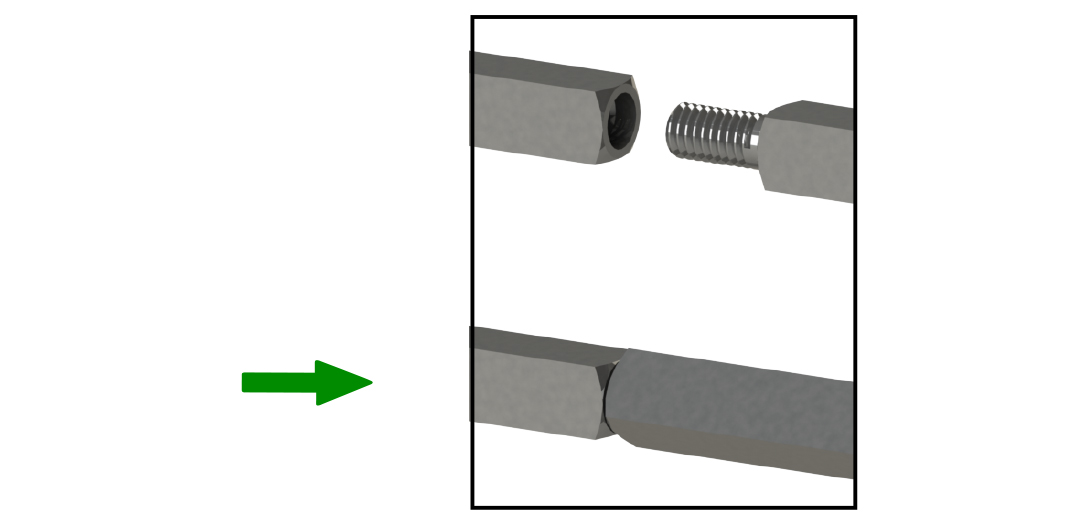
Step3
Install another guide rod in the other hole in the same way.
The other two guide rods are screwed clockwise to the other end of the installed guide rods as shown in the figure.
NORMAL MISALIGNMENT
NOTE:Thread processing needs to have a certain clearance, so it is difficult to have the same plane after the guide rod is tightened, and there will be a normal misalignment. At this time, you only need to loosen the guide rod a little, Make sure that the surfaces of the two guide rods are flush.
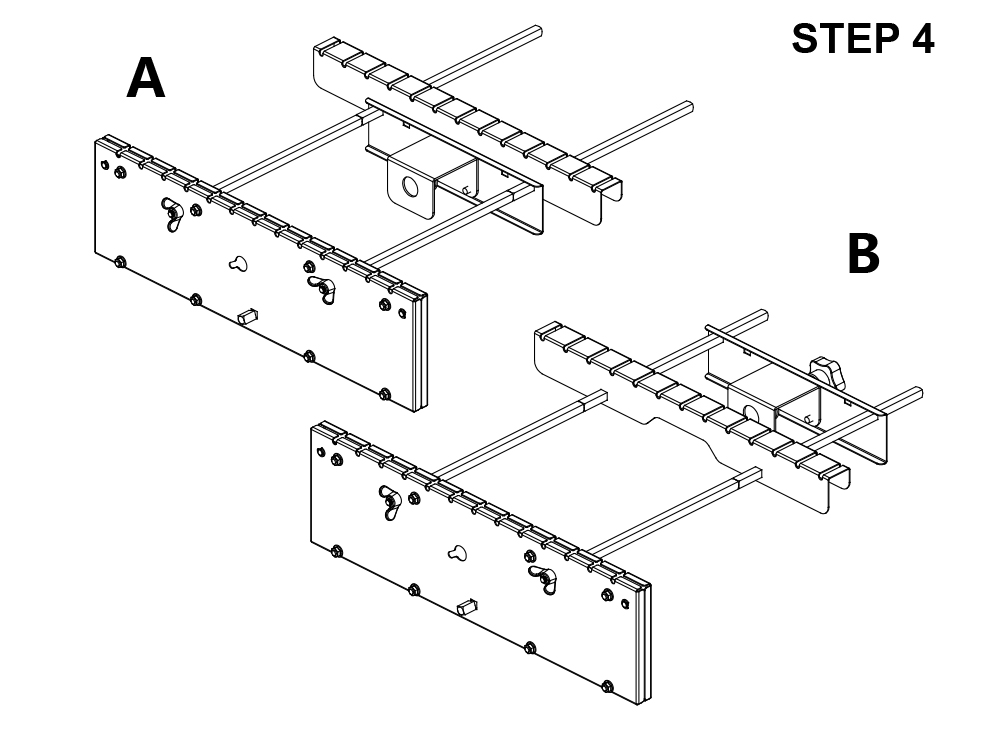
Step4
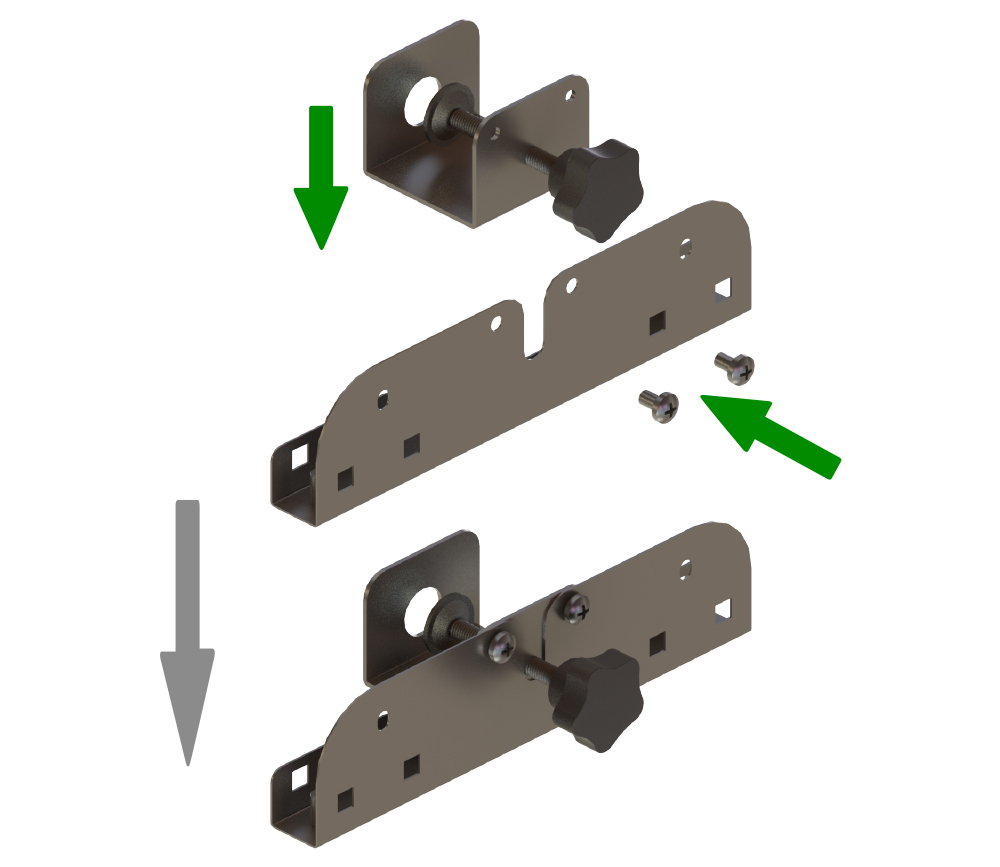
(According to the above figure, install the U-shaped frame on the fixing plate. If some models of U-shaped frame are pre-installed on the fixing plate. Please skip this step )
For ovens (BBQ stoves) with a width of more than 20cm, pass the Skewer support frame and the Fixed frame through the guide rod in sequence as shown in Figure B; for ovens (BBQ stoves) with a width of less than 20cm, pass the Fixed frame and the Skewer support frame through the guide rod in sequence as shown in Figure A.
Step5
As shown in the figure, loosen the handle on the Fixed frame counterclockwise, and place the guide rods on the appropriate position of the oven or BBQ stove (sold separately, the same below), and the U-shaped frame on the Fixed frame is stuck on either side of the oven (BBQ stove).
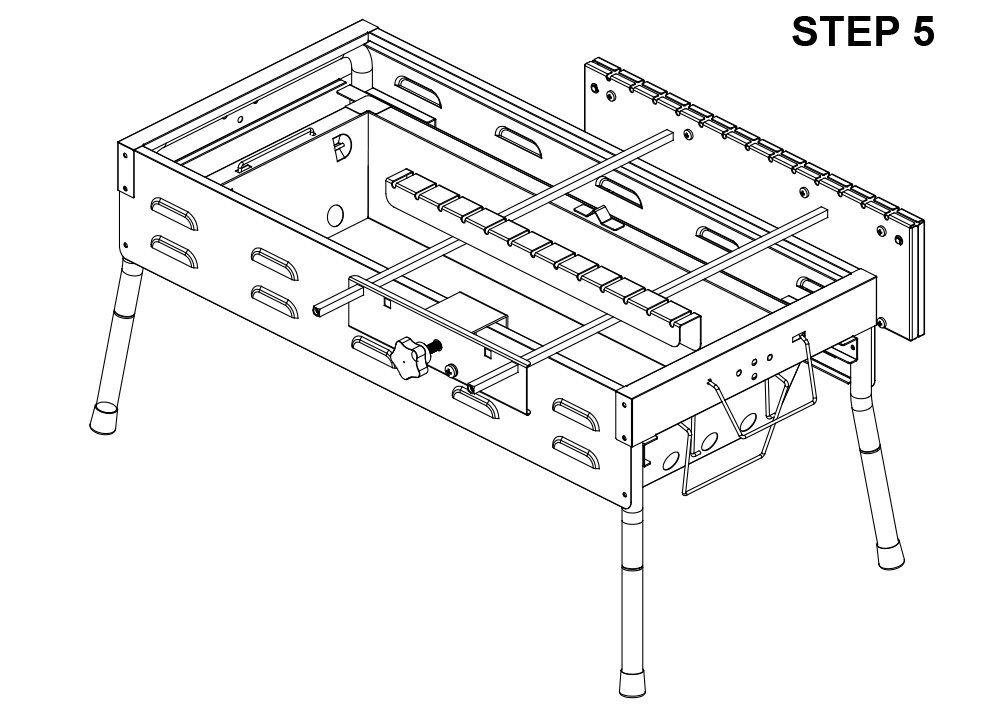
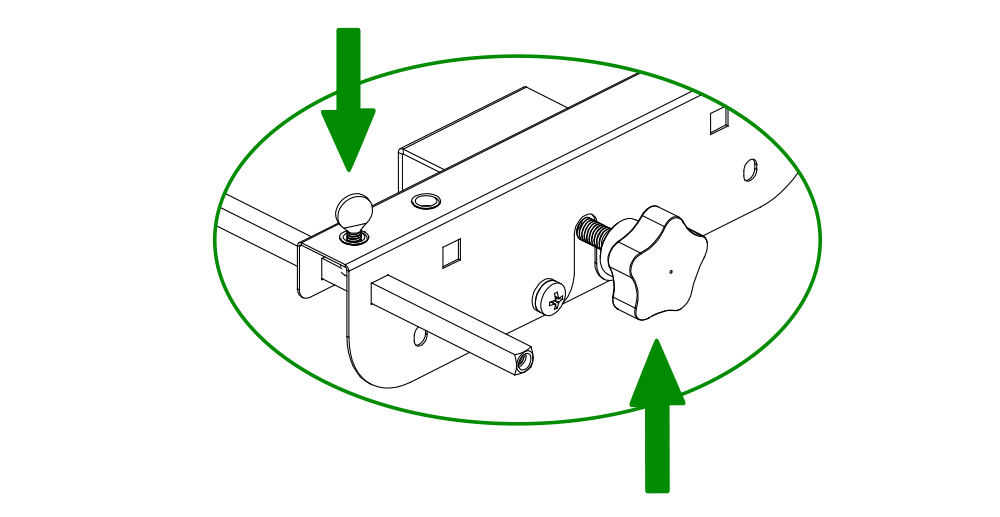
Step6
Adjust the position of the Skewer support frame and the Fixed frame according to the length of the skewers to ensure that the effective part of the skewers is above the fire in the oven (BBQ stove) and the other end of the skewers is in the slot of the Skewer support frame.
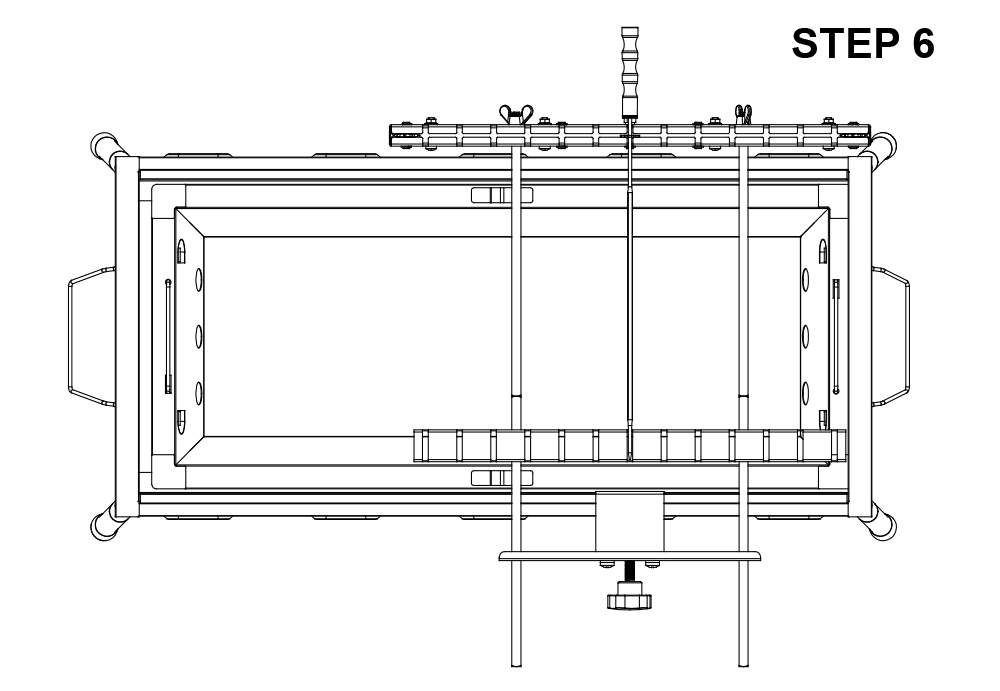
Tighten the handle and thumb screws on the Fixed frame clockwise.
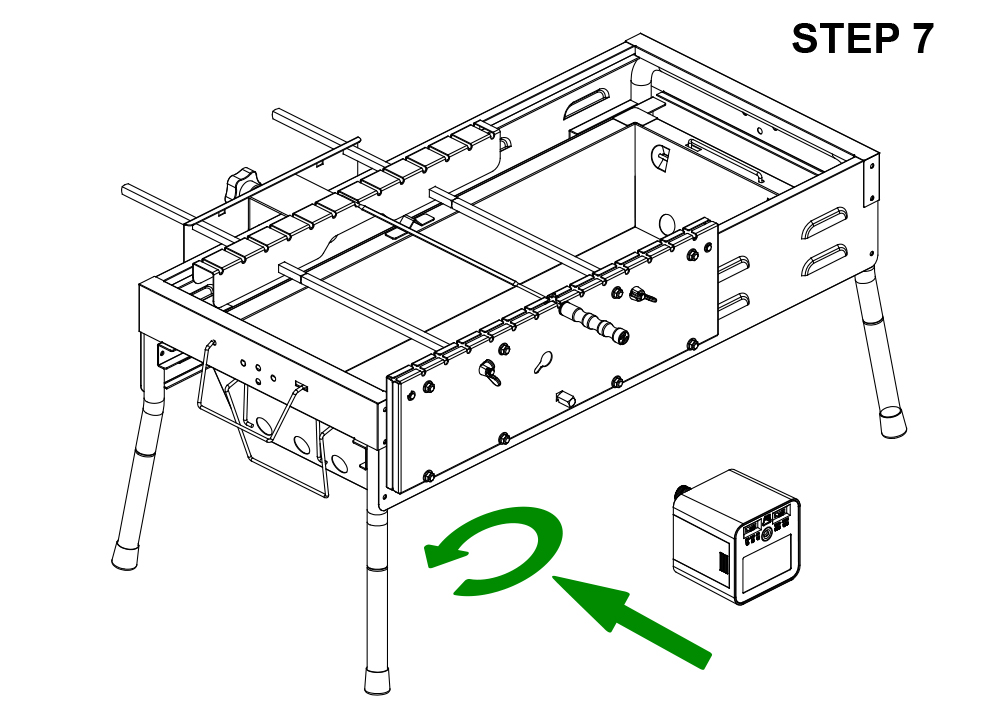
Step7
Refer to motor installation instructions(Click the picture below)。
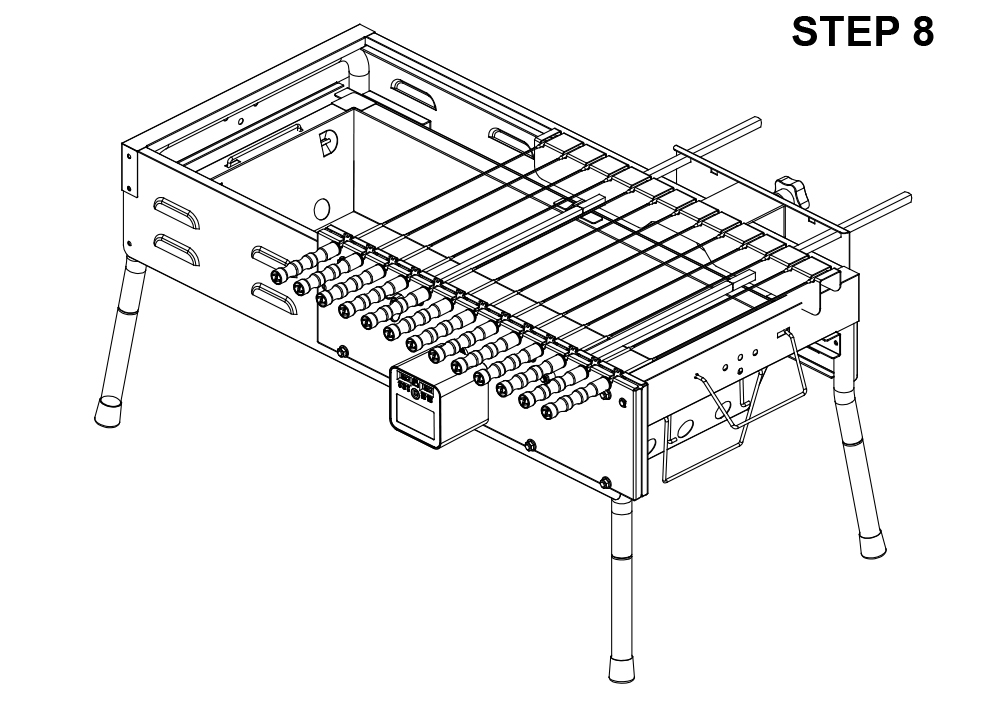
Step8
The installation is complete.
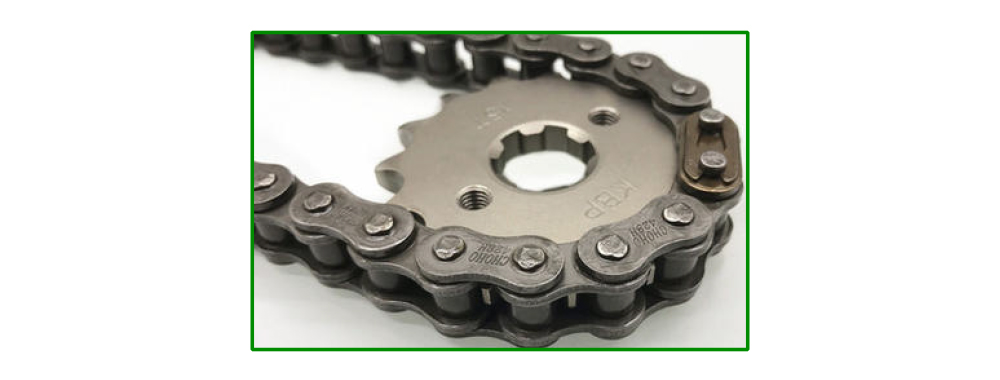
AUTO FLIP SKEWER MAINTENANCE
The Auto Flip Skewer is driven by a chain. After use, please wipe it clean and dry it and store it in a dry place. If possible, add chain oil to it to prevent the chain from rusting for a long time and cause transmission difficulties.
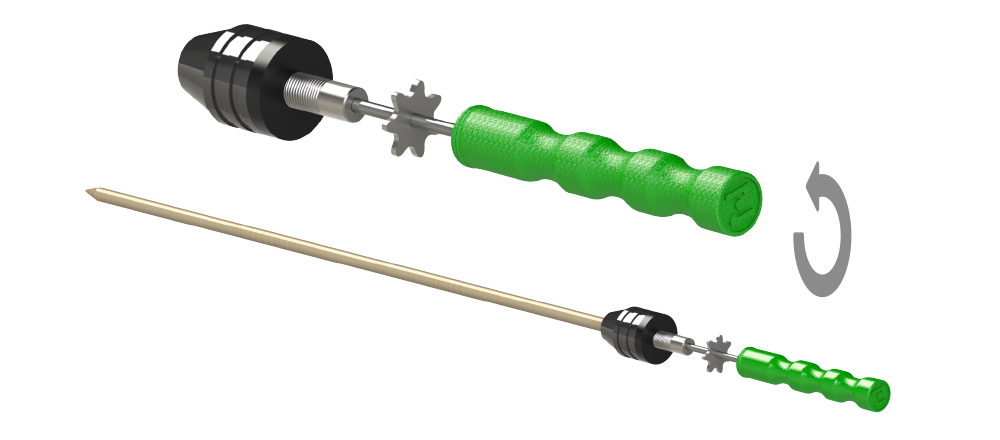
MOTHER CLIP INSTALLATION
Before using for the first time, adjust the mother clip according to the size of your own bamboo skewers or other baking needles to be clamped (mother clip chuck fixed rotating handle or handle fixed rotating mother clip chuck). In the later use, just turn it clockwise to tighten it, and turn it counterclockwise to loosen it.
Note: Please wear BBQ Anti-scalding gloves when loading and unloading the baking needles
Installation Video: