
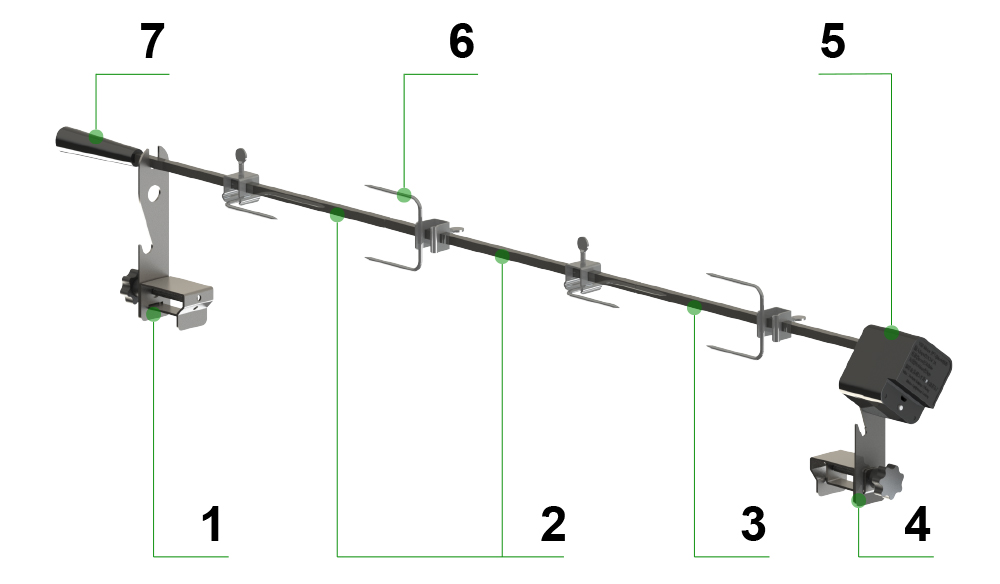
1. Sub bracket 2. Extension rod 3. Rotating rod 4. Main bracket 5. BBQ Motor 6. Fork 7. Nylon Handle 8. Handle

INSTALLATION STEPS (FOR Automated Rotisserie Model 4078)
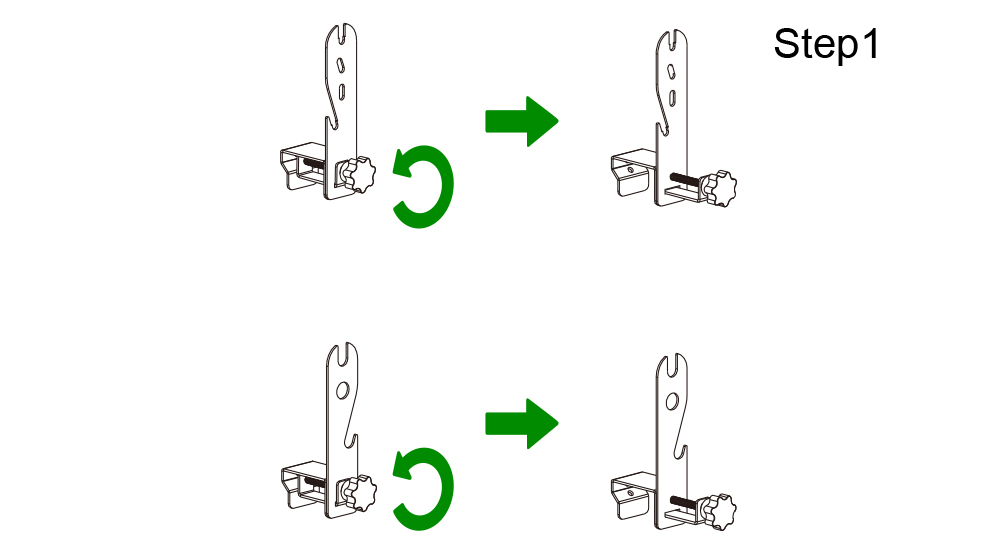
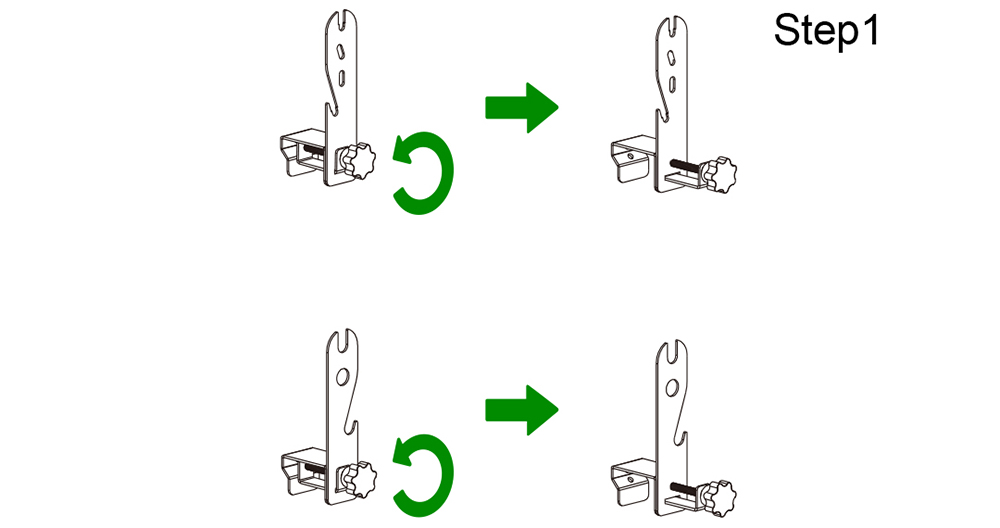
Step1
Turn the locking screws on the main bracket and sub bracket counterclockwise to loosen to the appropriate position.
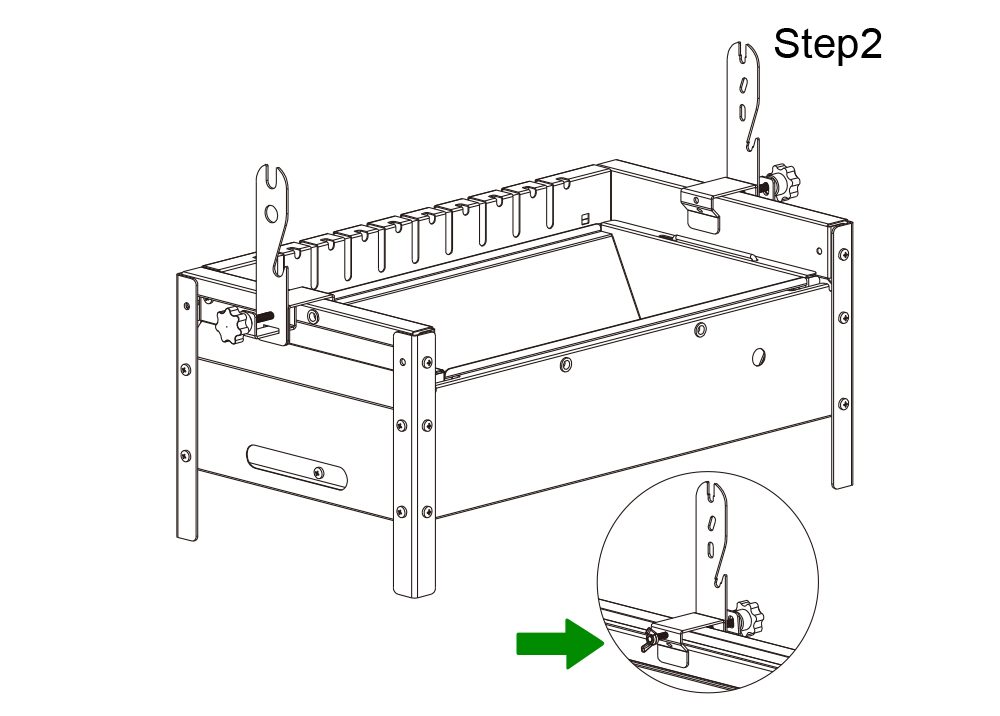
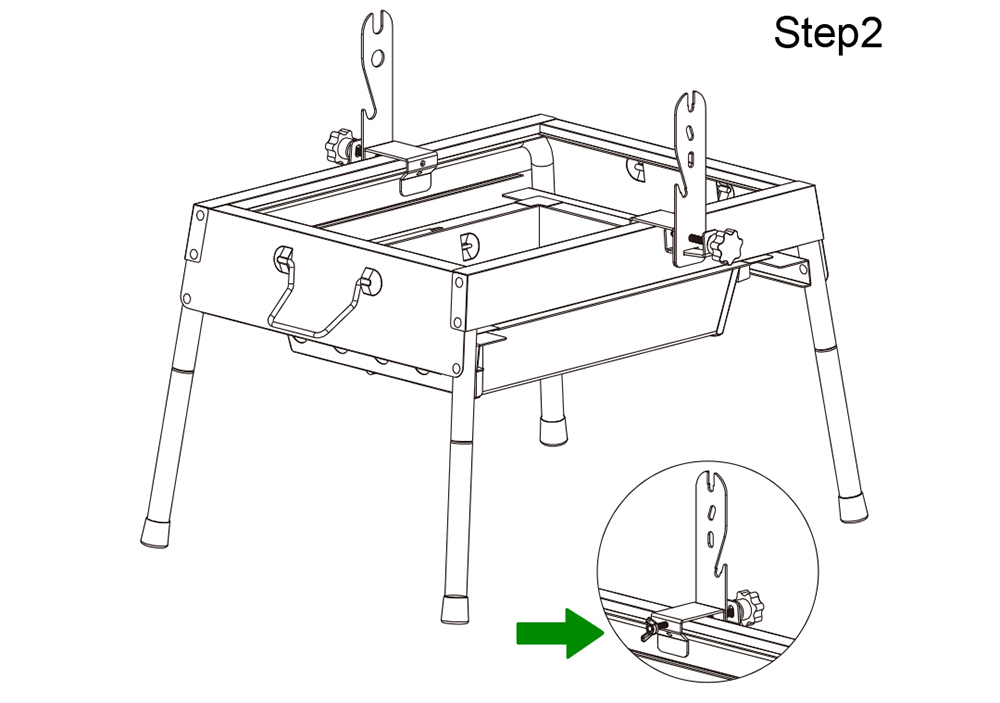
Step2
Clamp the main bracket and sub bracket to the appropriate position of the oven(BBQ stove) (sold separately, the same below), Turn the locking screw clockwise not to tighten, and choose whether to use auxiliary screws according to the shape of the oven(BBQ stove).
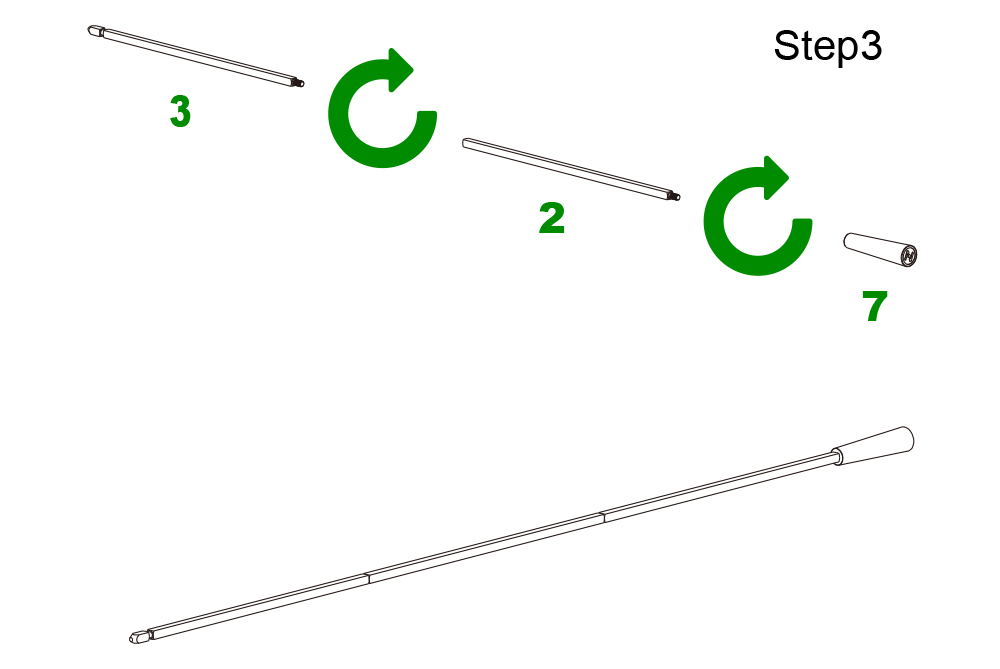
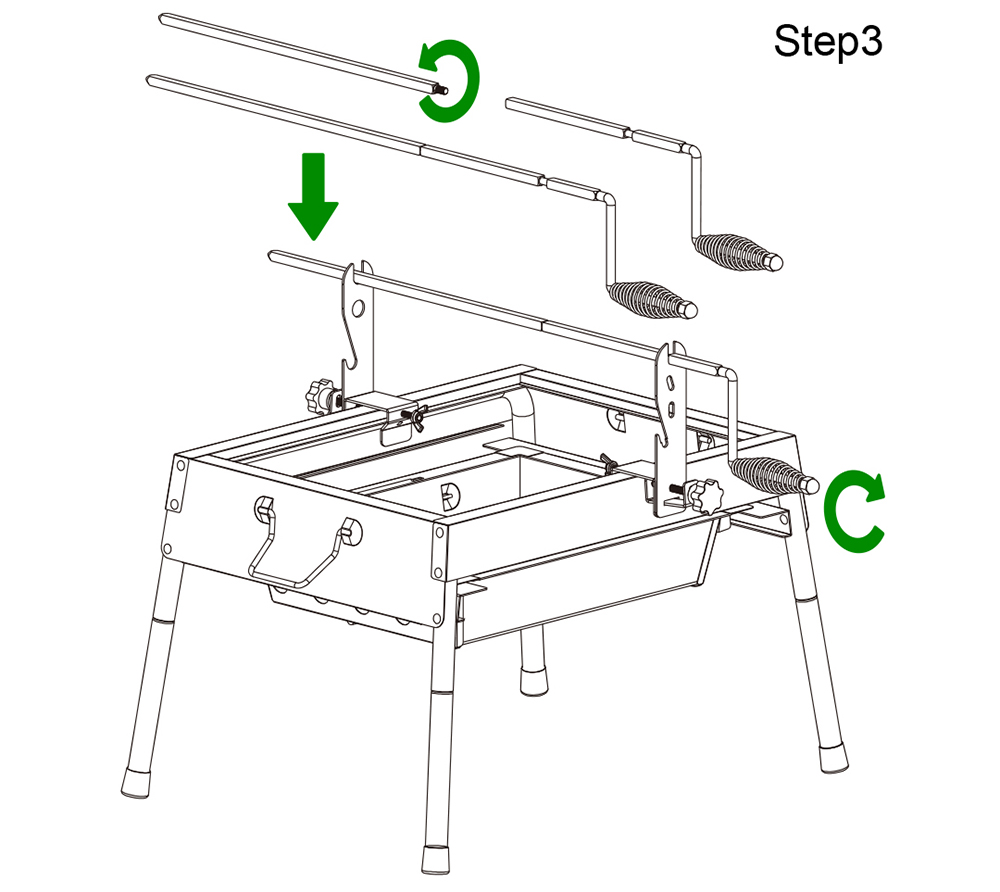
Step3
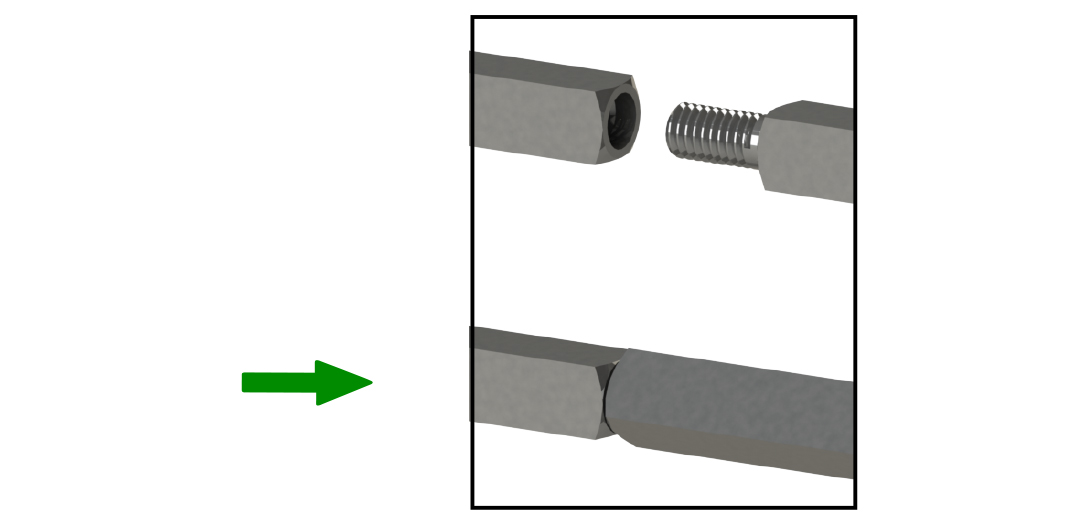
Turn the one or two Extension rods(2) clockwise to the Rotating rod(3), do not tighten, Screw the Nylon Handle(7) to the Extension rod (2) in the same way and tighten it.
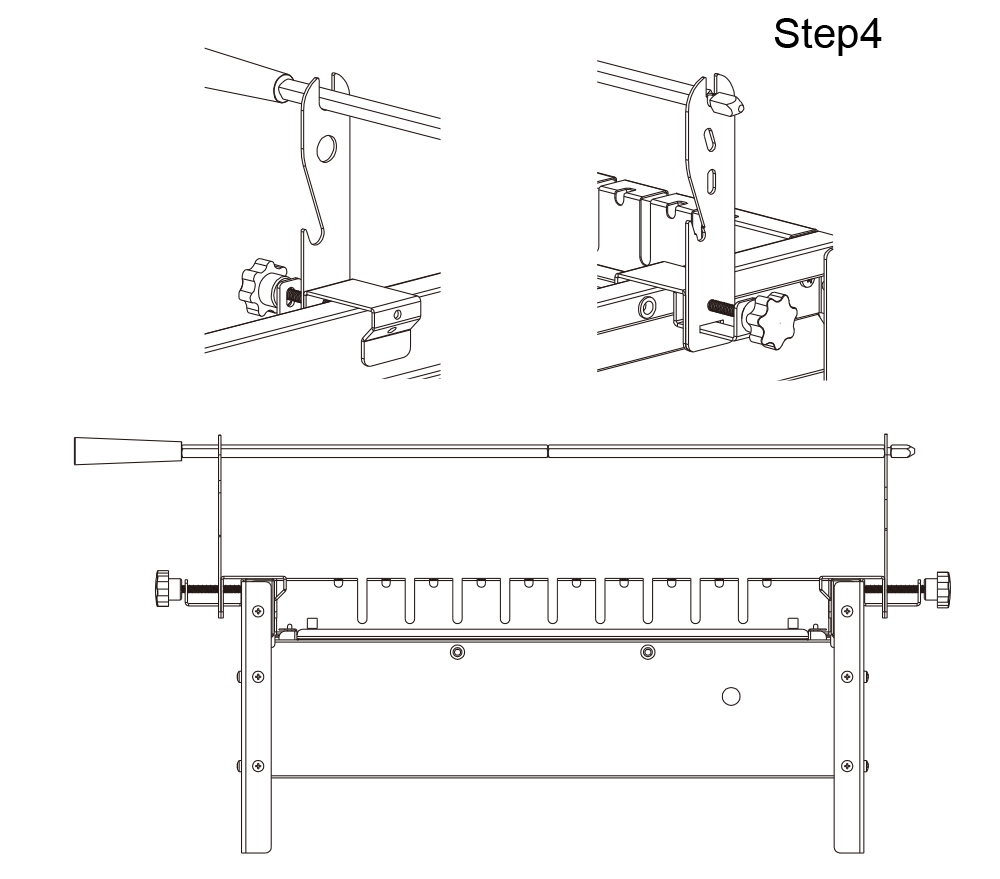
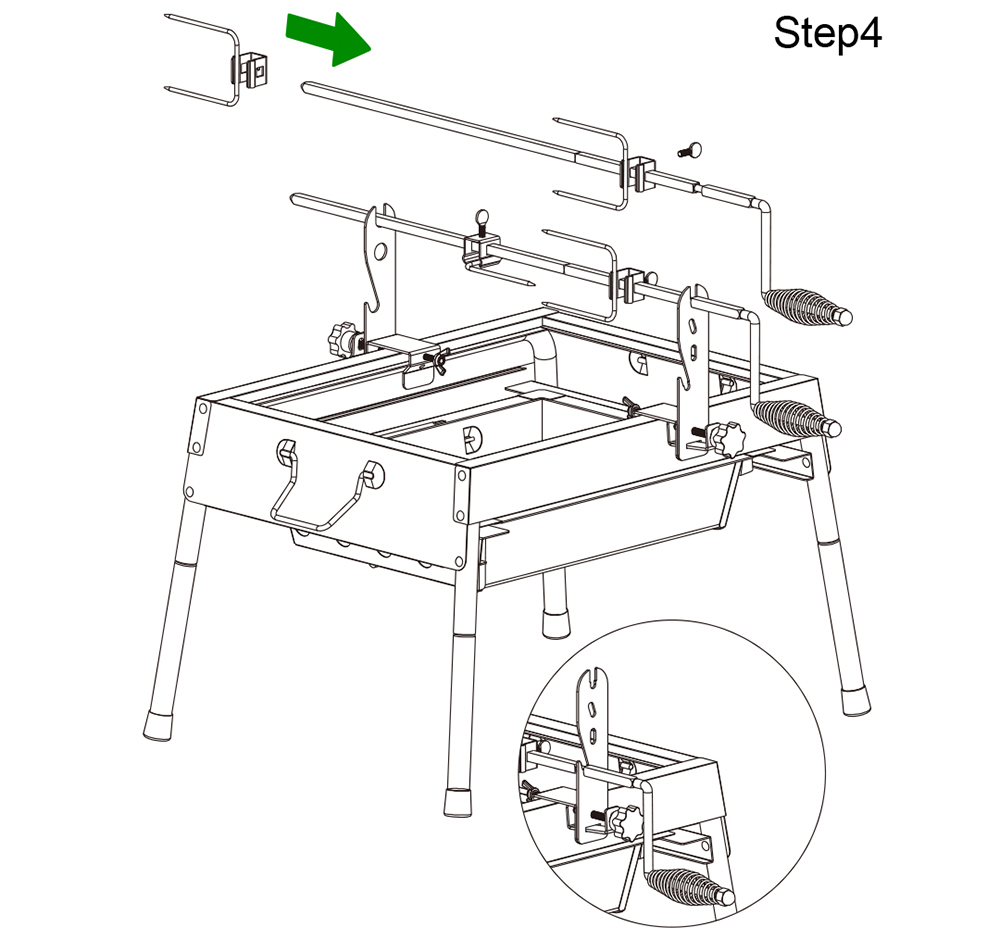
Step4
Put it on the main bracket (the Rotating rod is placed in the small groove) and sub bracket (the Extension rod is placed in the large groove) to test that it can rotate smoothly, and then tighten the locking screws (the same as the auxiliary screws).
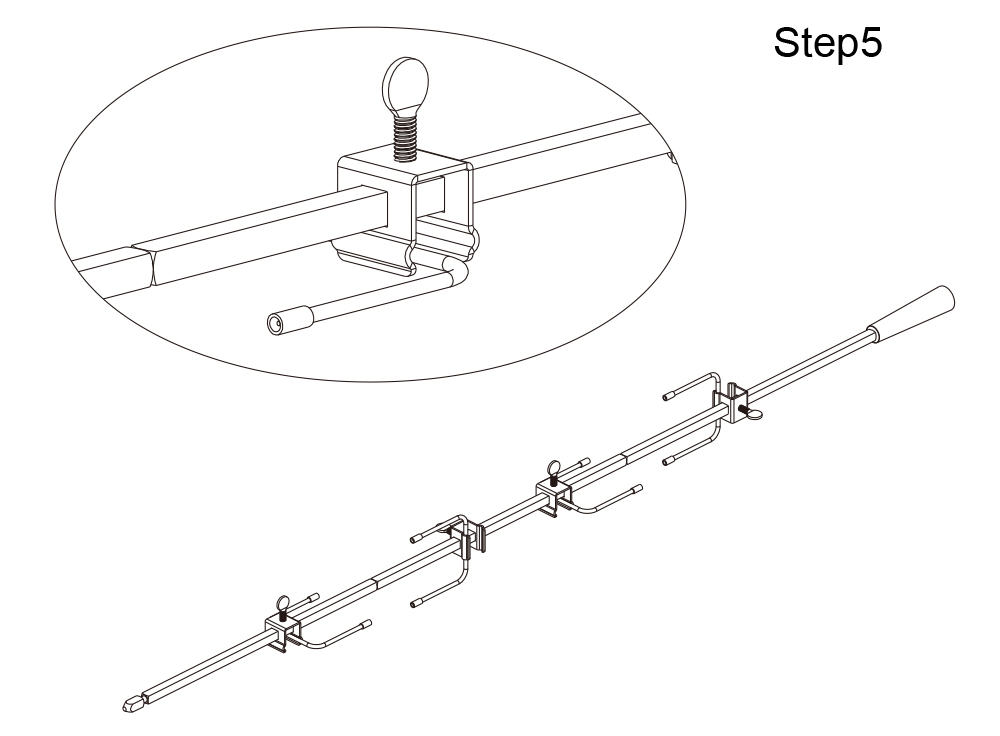
Step5
The forks through the rod, screw the thumb screws to the forks. After loading the food, adjust it to the proper position and tighten the thumb screws.
NORMAL MISALIGNMENT
NOTE:Thread processing needs to have a certain clearance, so it is difficult to have the same plane after the rod is tightened, and there will be a normal misalignment. At this time, you only need to loosen the rod a little, then put on the fork to the rod after the plane coincides. Tighten the rod after all the food is loaded.
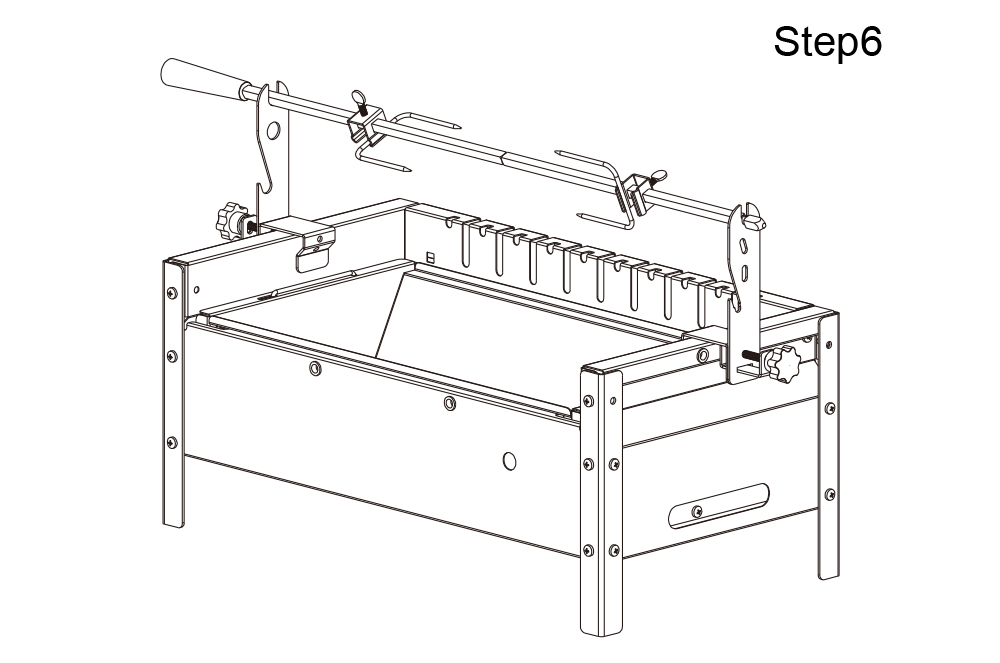
Step6
Refer to step 4 place it in the proper height on the brackets to rotate.
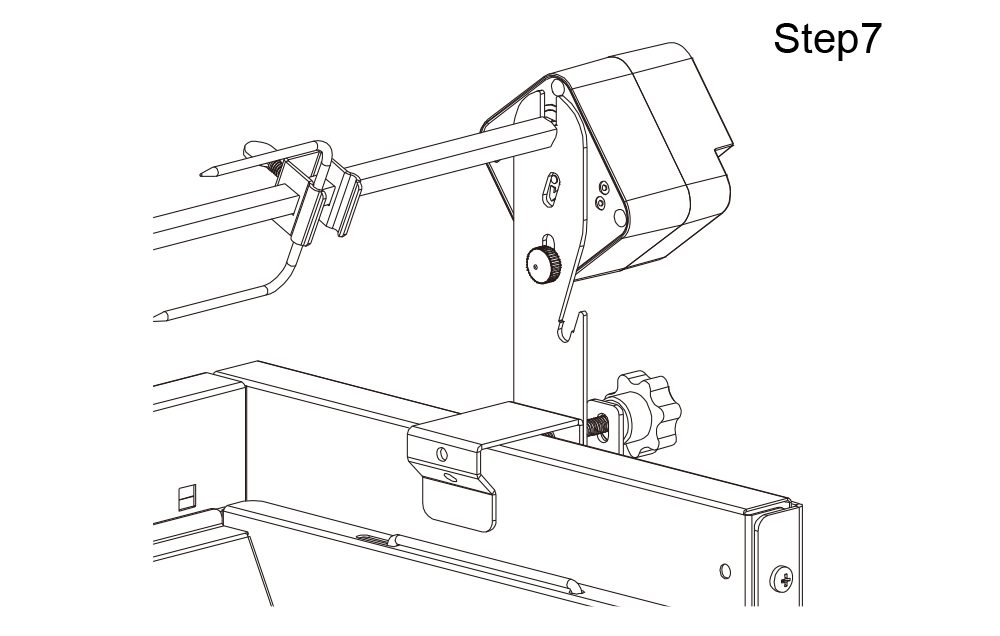
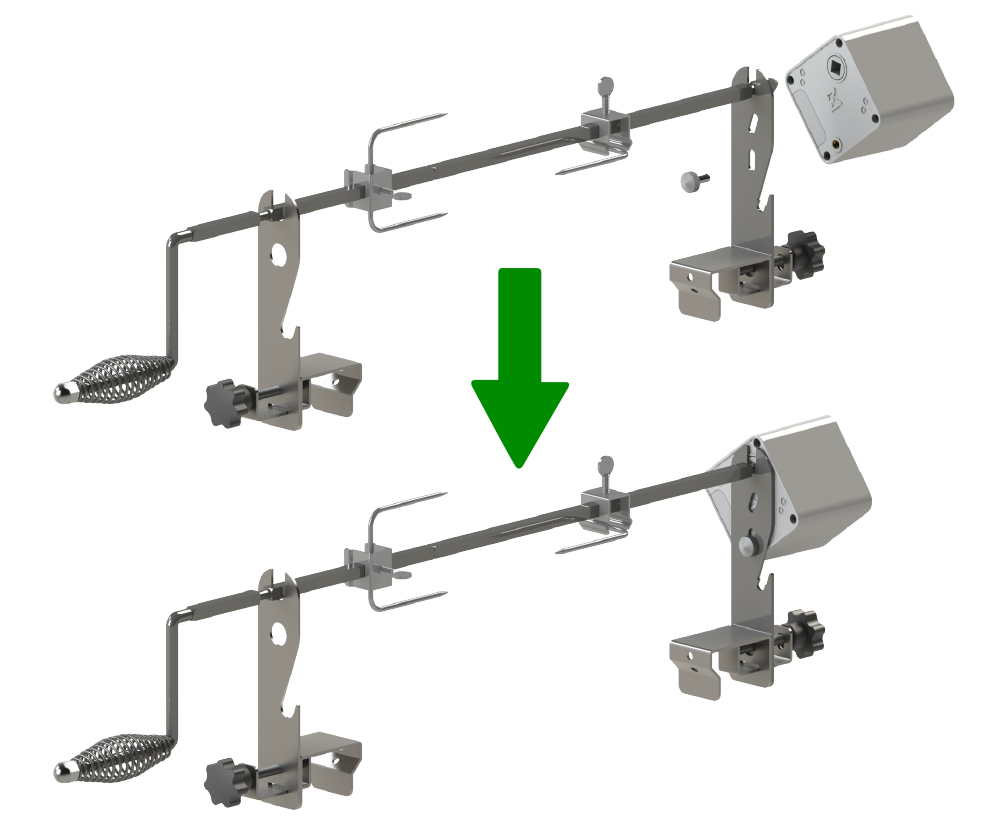
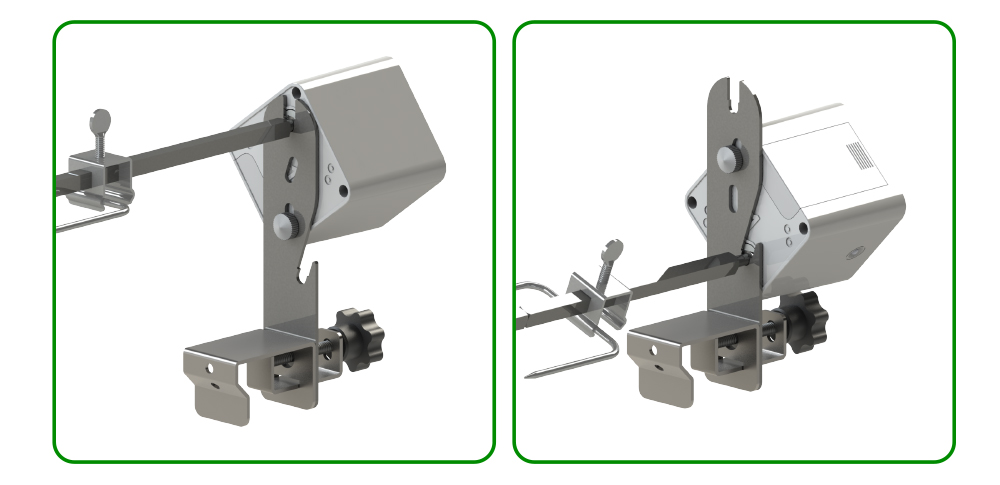
Step7
Refer to motor installation instructions(Click the picture below)。
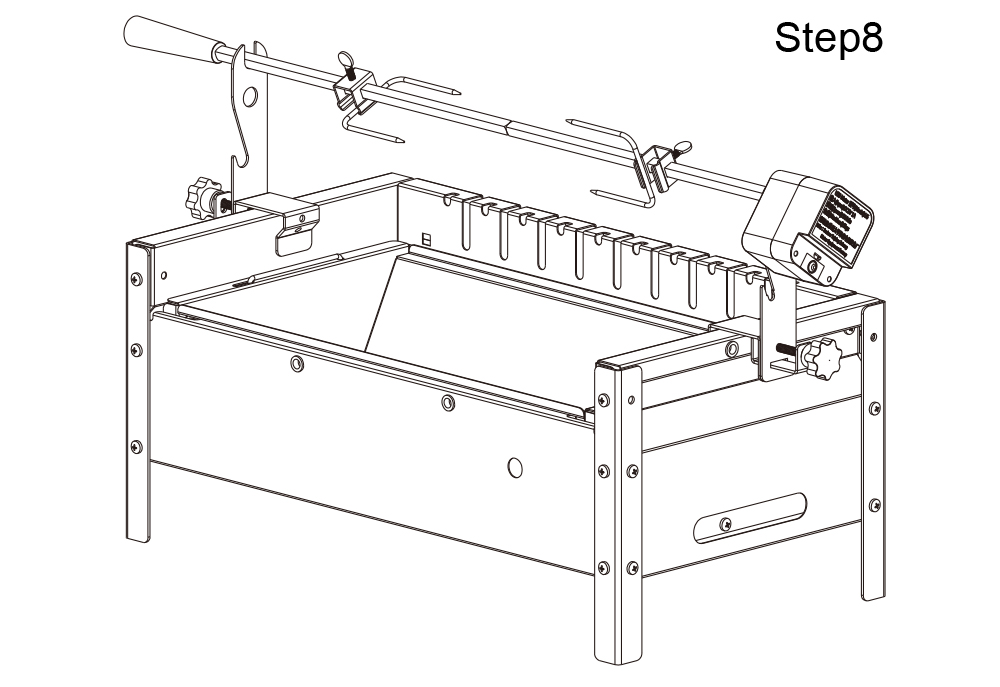
Step8
The installation is complete.
INSTALLATION STEPS (FOR Manual Rotisserie Model 4035/4065)
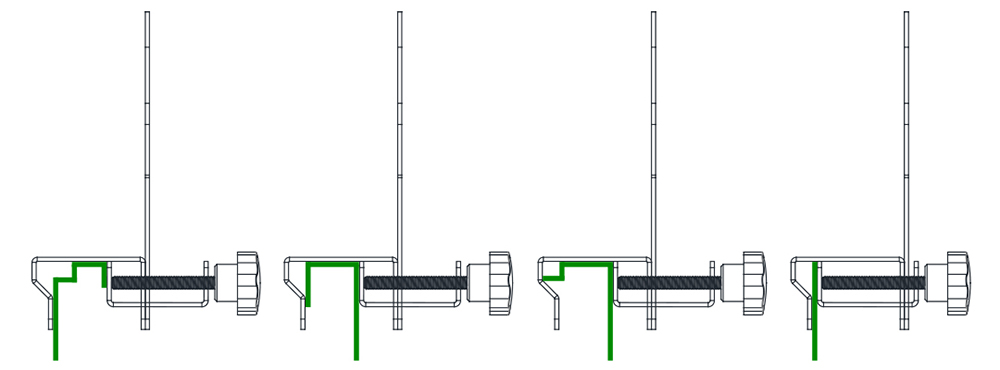
USE OF AUXILIARY SCREWS IN DIFFERENT OVENS(BBQ STOVES)
NOTE: The below green wire frame is the shape of the clamped oven(BBQ stove) wall,The auxiliary screws is M5*35mm wing screw.
Option1:Auxiliary screw in the lower hole
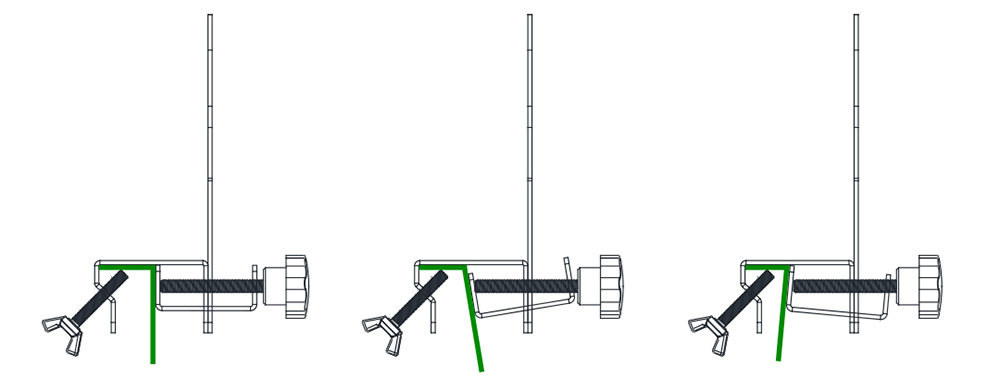
Option2:Auxiliary screw in the upper hole
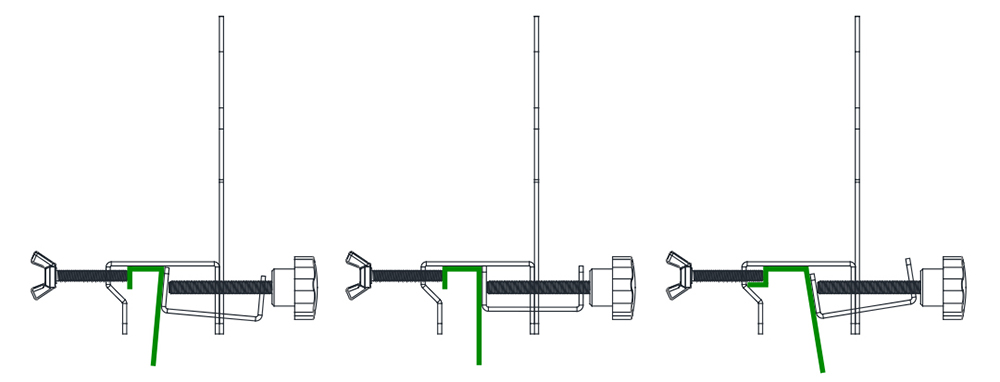
Option3:No auxiliary screws
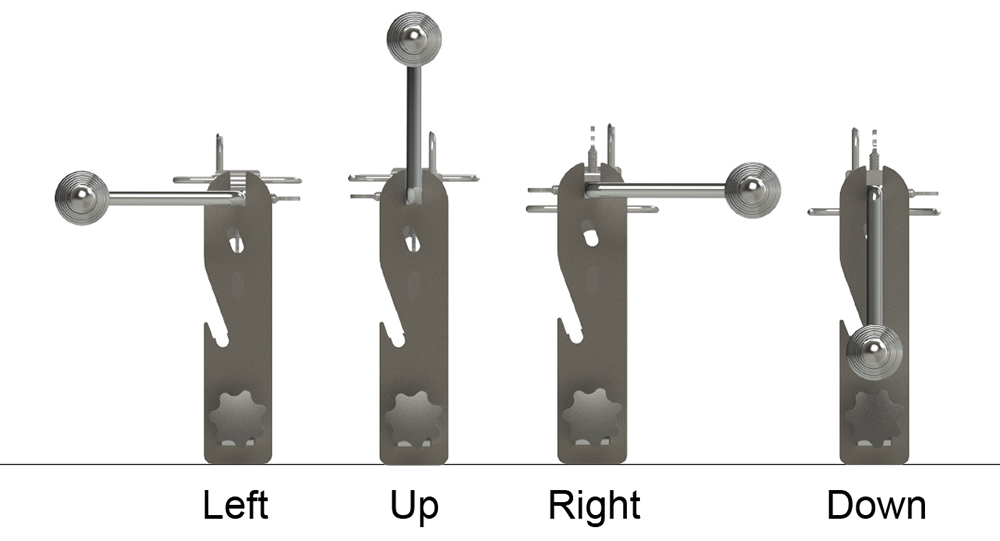
POSITION HOLD
When you are tired by hand rotation, you can find a suitable position to keep. Can be kept in horizontal or vertical position.
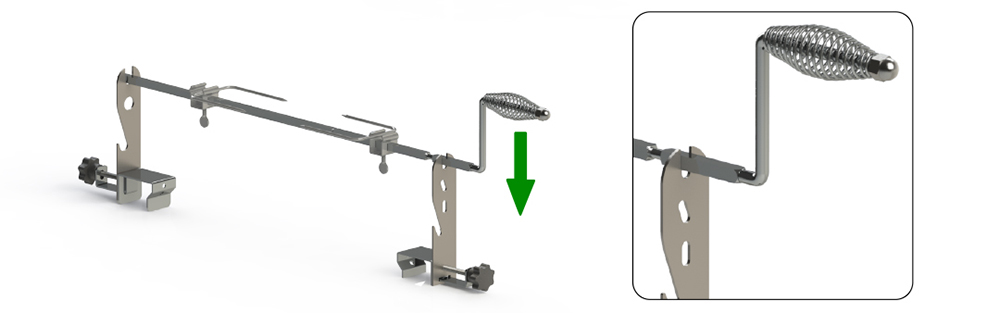
Step1
Turn the locking screws on the main bracket and sub bracket counterclockwise to loosen to the appropriate position.
Step2
Clamp the main bracket and sub bracket to the appropriate position of the oven(BBQ stove) (sold separately, the same below), Turn the locking screw clockwise not to tighten, and choose whether to use auxiliary screws according to the shape of the oven(BBQ stove).
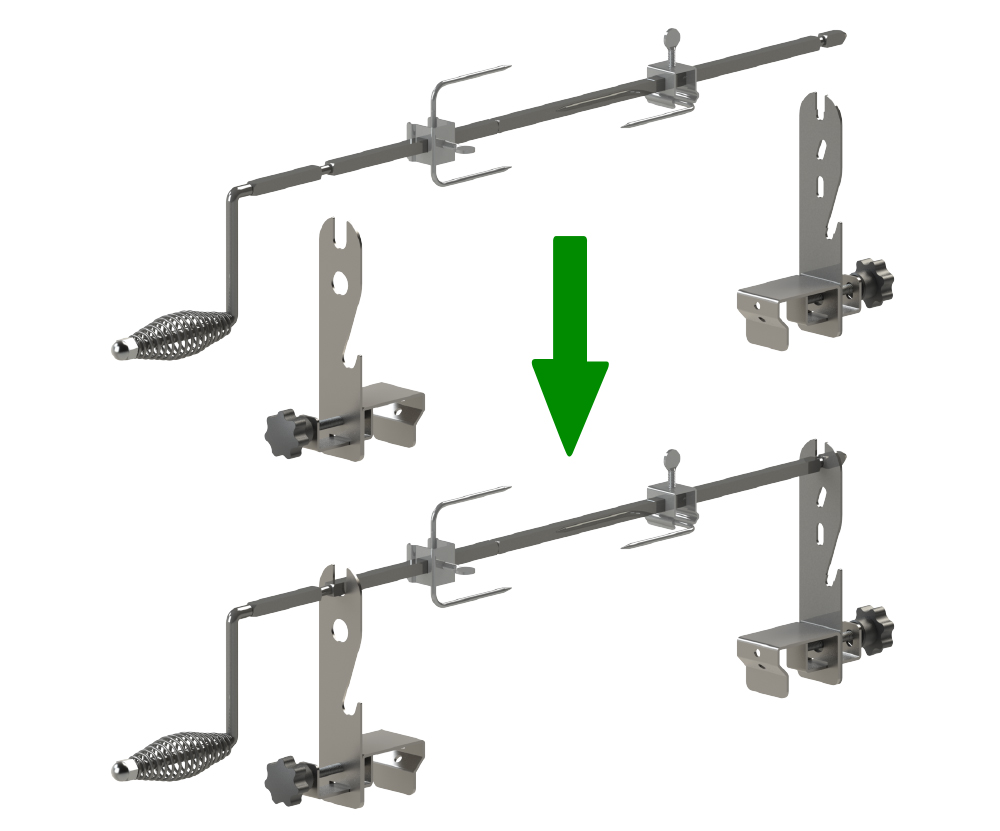
Step3
Screw the rod to the handle, do not tighten, put it on the main bracket and sub bracket to test that it can rotate smoothly, and then tighten the locking screws (the same as the auxiliary screws).
Step4
The fork through the rod, screw the thumb screw to the fork. After loading the food, adjust it to the proper position and tighten the thumb screws. Place it in the proper height on the main bracket and sub bracket to rotate by hand.
NORMAL MISALIGNMENT
NOTE:Thread processing needs to have a certain clearance, so it is difficult to have the same plane after the rod is tightened, and there will be a normal misalignment. At this time, you only need to loosen the rod a little, then put on the fork to the rod after the plane coincides. Tighten the rod after all the food is loaded.
STEPS FOR POSITION HOLD
Step1 Pick up
Step2 Push forward
Step3 Put down
Installation Video:
INSTALLATION STEPS (FOR Automated Manual Rotisserie Model E4035/E4065)
STEP1
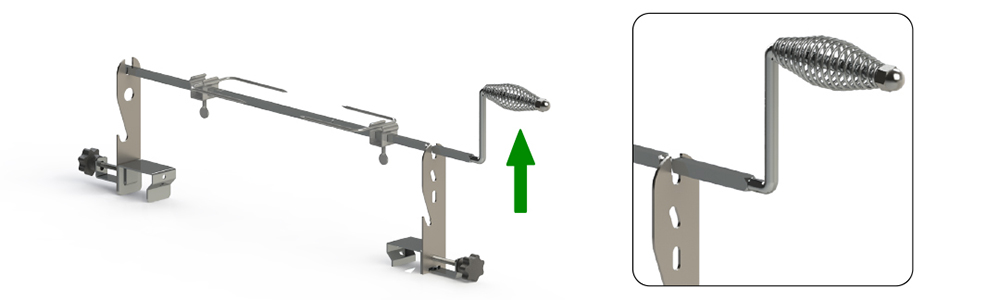
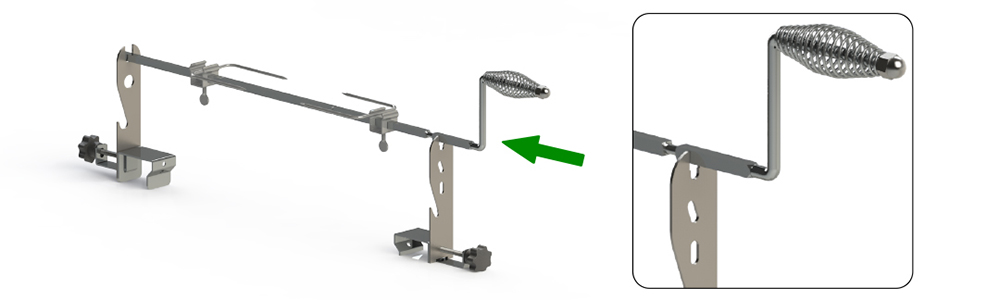
Place the installed fork rod as shown in the figure, align the small notch of the (3) Rotating rod with the small groove on the support frame, and place the other end in the large groove of the other support frame.
STEP2
Refer to motor installation instructions(Click the picture below)。
2 height installations
Installation Video: